Lizzard Loves Blue Sky Snow Covered Vail

Thursday, November 15, 2012

Baking supplies; from a wonderful baker

I love baking. 

Twin loaves fully cooked in the pan
The dough fully risen ready to bake
I also love when someone thinks of me as "someone who loves baking" because it somehow legitimizes my love. My great friend, CC, is moving in a matter of days (she is an accomplished professional dancer as well as a wonderful baker of extreme deliciousness) to take a new job on the other side of the world. It warms my heart to see someone I hold so dear embarking on such a great adventure. But, as usual, I digress. 


Crusty twin loaves ready to be e
As I mentioned, CC is a wonderful baker, but she is also a very thoughtful friend. She was beginning to pack up her apartment to move her worldly things to a storage unit and realized she was the proud owner of A LOT of baking supplies. Not wanting them to go to waste, but rather to a happy home, CC emailed me to find out if I would like the supplies. A quote from her email that made me smile from ear to ear: "you're the only one i know who may bake as much as i do. i certainly don't want to be throwing away precious baking supplies." CC is right; baking supplies are indeed precious & I was to become the proud owner of a plethora of them! Please don't think that I was lacking in the department - my cabinets stay chock full of the makings for bread, cookies, cake, and scones but that wasn't important to me. The important thing was that CC was giving me a piece of her kitchen that she couldn't store, nor take with her on her new adventure. She knew by giving them to me, the flour, sugar, baking powder, salt, and decorations would come to life as wonderful treats rather than be thrown in the garbage. 

So to appropriately honor my love of baking I baked a "twin" loaf of bread using some of the new supplies. I formed the dough separately, but cooked them together in 1 pan.....so its sort of a two for one type of boule :) I am looking forward to sharing other baking creations soon. Thank you again CC for sharing your bounty with me!


Wednesday, November 14, 2012

Chalkboard paint

I love chalkboard paint. 

There is White Castle, my home for 2 years!

Who knew back in 2003 when I moved into a college house called "White Castle" (with 11 other people) that I would have my first experience with chalkboard paint? Some forward thinking college woman before me had painted a large portion of the living room wall with chalkboard paint & hung a frame around it. It was our house's place to track bills/expenses & it worked perfectly. You may wonder why it took me so long to try it out! I don't have a great excuse although since I own my home now; it is much easier to do painting projects of any kind. (I have owned my condo for 4 years.....so it still has taken me awhile to get going on this!)


Paint & primer are on!
Chalkboard paint drying
Fast forward 9.5 years to now & chalkboard paint is everywhere! My brother & sister in law painted 2 of the walls in my nephew's bedroom with the stuff and it provides him with some entertainment when he wants it. Pinterest is overflowing with chalkboard paint ideas, which is where I got the idea to paint the inside of my pantry cabinet doors with the stuff.


Almost out of list on the left
Ongoing projects on the right
A moment of love for my pantry cabinets; my Dad gave the cabinets to me, stained them to match my other kitchen cabinets & helped haul them up to the 2nd floor walk up I share with my husband. They give me so much additional storage in my kitchen, which I desperately needed (not to mentioned wanted.......because I love my kitchen and spend lots of time there; I want it to be orderly.)


Pretty colors of chalk
So over the course of a weekend, I taped, primed & painted the inside of my doors. I had the benefit of a recessed area in each door, which gave me a perfect outline of where to paint. I like the natural border or frame the door style gave me. Once I had painted the second coat of paint, I needed to wait 3 days for the paint to be ready for writing. All in all, the project took less than a week, including all of the drying/waiting time. In terms of supplies, I spent $20-$25 on 1 small roller brush set (which included a tray), 1 roll of painters tape, 1 small can of primer (only necessary if you plan to paint on unfinished wood; which the insides of my cabinet doors were), and 1 small can of chalkboard paint. I regret not asking for a paint stir stick at the hardware store........so do my wooden spoons :(

As you can see in the photos, I am using the left side of the pantry for a list of things I'm almost out of and the right side as a place to track ongoing cooking/baking projects. 'Tis the season for stocking up on cookie dough for my freezer and I like to have a list so I don't have to dig through the Ziploc bags in my freezer to remember which dough I've already made! The completed doughs have a check mark in the box (I don't want to erase them until I've finished them all; lest I end up with 4 batches of plain peanut butter cookie dough & no chocolate chocolate chip dough :)

Reused a preserves jar for my chalk!

Please let me know in the comments what you think & if you have any questions about how to do this relatively quick project at home.

I will have another post soon about the pantry reorganization (specifically baking supplies) that happened in the same weekend!

Thursday, November 1, 2012

I love fall.....part II

I love fall enough that it warrants a second post!
Lizzard Loves Fall.Walking on the Geneva Lake path
Lizzard Loves Fall. Fire in the fireplace. Perfection.


Lizzard Loves Fall. Jack-o-lanterns keeping watch from our place
Lizzard Loves Fall. Trick or Treat!


There is just something magical for me about fall;
the weather
the coziness
the hot drinks (spiked apple cider anyone?? I used Apple Pear Brandy last weekend and it was delicious)
the curling up by the fire, the chilly walks along the water
the Halloween costumes on my nephews & neighborhood kids
carving pumpkins & the resulting pumpkin seeds
making Pumpkin Pie Almonds (obviously I found the recipe on Pinterest- here is the link; http://kneadtocook.com/?p=2151)
there are so many reasons this season is the best one there is. 

I hope you all are enjoying fall this year!

Saturday, October 6, 2012

Popcorn on the cob

I love Fall.

Before.....
It is the season of cool weather, my birthday, beautiful leaves, pumpkin everything, squash, jeans+boots, crisp days & nights, fires in the fireplace & (for me at least) popcorn.

I also love farmer's markets & farm stands of all stripes. I bought an incredibly fun treat at Pearce's Farm Stand over my birthday weekend in Wisconsin. This is a family run farm stand which comes fully to life in the fall; they have an annual customer appreciation weekend with live music, corn, bratwurst & kettlecorn. Amazing small town fun for everyone! You can find them on Facebook, you'll see what I'm talking about; http://www.facebook.com/pages/Pearces-Farm-Stand

Cob in the bag, bag in the microwave - getting cooked!
As I lose my train of thought; I should be reminded to get back to the popcorn! I saw dried corn on the cob for sale at Pearce's last month and figured I should absolutely buy them, because of my aforementioned love of popcorn in the Fall. 

After! So awesome.
I giggled like a schoolgirl while this was popping in my microwave! Well, to be perfectly honest, the popping took about a minute and a half to start and being that I am more than slightly distractable; the explosions from my microwave scared me so much I jumped and yelped quite loudly at the same time. (the good news is I was at home & didn't need to explain myself to Chris) The minor fright was followed my unadulterated childlike happiness at the silly feat of popcorn coming off of that dried cob after only a few minutes in the microwave!

It tastes delicious - I didn't add any butter/oil/salt/flavoring, yielded a full bowl of popcorn & all of it has been eaten less than 24 hours later. 


Needless to say, I am back in Wisconsin today, went back to Pearce's and bought 6 more of these. They are just too fun. Happy Fall everyone!

Soft Pretzels

I love soft pretzels.

Ger & Volker meet our train
Before this summer though, I loved the soft pretzels I could get at Wrigley Field, or at a bar with dipping sauce; I had no idea what I was missing.

National Lampoon's European Vacation (my pet name for our trip abroad this summer) took Chris & me to Munich, Germany. We stayed with my cousin & her husband; perhaps the most gracious hosts in the world. They were waiting for us in the main train station at Munich when we arrived, carrying signs, wearing an Irish flag (the heritage my cousin & I share), and a German one (partly because they didn't have an American flag to wear & the German flag was welcoming us to the their country!).


Obizda - soft cheese with herbs & Camembert. Amazing.
Olympiapark (Olympians need pretzels!)

Breakfast at Ger & Volker's home.YUM.

Brunch at the Hofbrauhaus
Lunch at the Viktualienmarkt beer garden
But back to the pretzels. Perhaps I am the last person on Earth to realize how perfect a fresh made hot pretzel is? This could be the case, but I was blown away by the salt flecked crust that gave way to a chewy center. The pretzels we enjoyed in Germany came in all shapes & sizes- we made an effort to try them everywhere we stopped! Ger (my cousin) would always be awake before her lazy house guests (us. darn.) and go to her local bakery to buy pretzels as part of our breakfast, then we would get a pretzel at a beer garden, and perhaps another as an afternoon snack. And so it went!

The photos give you some idea of how many pretzels I was capable of eating in 5 days..........

Friday, October 5, 2012

La Tour Eiffel

I love the Eiffel Tower. 

I think it is wonderful that it is just a structure. It wasn't designed to do anything (other than be beautiful & astonish the world; which I'd say it succeeded massively on both fronts).

The first apartment we stayed in while in Paris had a view of la Tour Eiffel from the kitchen window. Granted, it was in the distance, as we stayed in the 12th arrondissement - away from the action in a quiet neighborhood. That being said- being able to look out the window & see the Eiffel Tower within hours of our touchdown at Charles de Gaulle made me abundantly happy.
The view from our 1st apartment - Eiffel Tower at night!

Cheers!
View from a boat cruise on the Seine
Gazing up at this breathtaking structure while sitting on the grass with Chris, sipping wine and enjoying a summer night; I was in heaven. The most romantic city in the world, its most iconic attraction, the love of my life & wine.....what's not to love?

I took about 100 photos of the Eiffel Tower throughout our days in Paris- here are a few of my favorites. I hope you enjoy them as much as I do.

Monday, August 13, 2012

Europe Fund

I love to travel.

Lizzard Loves....travel!

I also love to hoard change like a squirrel hoards acorns. Hence the "Europe Fund 2012" growler! I bought this growler in August of 2011, on a 2 week long road trip. I bought the growler in Columbus, OH at the North Market (http://www.northmarket.com/). If you've never been (& you have access to Columbus) please take the time to visit! It is chock full of delights; food, beer, wine, shopping, and Jeni's Splendid Ice Creams (http://www.jenis.com/) which is perhaps the most delicious ice cream I've ever had.

The growler accompanied me home in a cooler with some freezer packs, so I had a treat to give Chris when I returned! Now onto the growler's rebirth.....

Fast forward 6 months to February/March 2012. Chris & I decide we should take another big trip in August, this time to Europe! The label went on the growler & the saving of all change began.

We leave in 4 days for our 2 week trip and I think it is time for me to cash out our growler full of change. 

Well, we only made it 3/4 of the way full- but hopefully there is enough money in it to buy some wine+cheese in Paris, beer+pretzels in Munich & whatever we feel like in Prague ;)

Bon voyage to us!

Thursday, August 2, 2012

Coffee from around the world

I love coffee.

I also love my sister (shocking I'm sure :). 

Organic Coffee from Nepal!
Returning from her trip to Nepal & Bali, my sister carried gifts galore, including some amazingly delicious organic coffee! I support eating locally - I know its good for me & the world, but coffee doesn't grow in Chicago...so why not try some from Nepal?? 

I bought the square glass container for my coffee grounds after my sister brought me the coffee, because I never know where to put the ground coffee........because the bag it came in is full of the beans! My coffee grinder only handles enough beans for 3/4 of a pot, but I like to grind more at one time. Enter my simple new container. 

How do you store your coffee? Do you grind it at home? I'd love any new ideas you all have!

I'm back to my coffee now; it is the best way I can start my day. Thanks again sissy for such a delightful gift from around the world.


Tuesday, July 31, 2012

Mini kitchen makeover

I love my kitchen.

As you probably can tell, if you've been reading Lizzard Loves, I spend quite a bit of time in my kitchen. The kitchen is one of the things I fell in love with when I decided to buy our condo. It is big, plenty of room to move around, ample counter space, and the list goes on. 
 Before...BORING.

I have lived in my condo for 4 years & in that time my Dad & Chris have helped with some great kitchen improvements (a dishwasher was added, side by side 9 or 10 foot pantry cabinets came too, plus the fun island that I blogged about previously), but I was feeling like I hit a plateau & was growing antsy to make my kitchen look better. Most of my previous improvements focused on increasing functionality and help my kitchen work better for me; the time had come to give it a face lift!

It would make me feel better if I knew other people had trouble motivating to do home improvement projects......I find it is too easy to simply think about the improvements you want, but not to actually take the time & effort to make them happen. I can't honestly remember what sparked this project, but I am so pleased with it!

In progress- no knobs!
My mini kitchen makeover simply involved removing the boring knobs/drawer pulls that were on the cabinets when I moved in & adding colorful new ones! Little did I know I would require my Dad's help yet again......because the screws on the new knobs were approximately 1/2 an inch longer than the old ones. How do you cut a screw? Well, you can call my Dad- that's how. My parents came down to our condo over the weekend & my Dad brought a small power saw with him to finish this project. I am disappointed in myself for not photographing my Dad doing this, but I was truly concerned for my (& my condo's) safety! Every time my Dad cut into a screw- showers of sparks rained down in my kitchen- they were popping all the way to the ceiling; it was utterly insane! Chris, my Mom & my sister were as freaked out as I was.....my Dad on the other hand seemed completely unfazed. I love my Dad.

After! So much better!
So here are the new knobs, there are 15 in all. They freshen the whole room, make it much more interesting to look at. All told, this project took approximately 2 hours of work (most of the time was spent by Chris & I cranking the new screws into place- because the head of the screw shows through the front of the knob, we couldn't use a screwdriver to get them into place. Instead we used pliers- it was way less easy.....but the knobs sure are cute, right??).
Close up of the knob I chose

Does anyone have summertime home improvement projects going on? Any mini makeovers in other rooms? I would love to hear the ideas you have, please share in the comments!

Monday, July 30, 2012

Cooking for friends

I love cooking for friends.
I also love cooking when I don't know how else to help a tough situation.

Packed & ready to give
A good friend of Chris & mine has had a tough time with health issues this summer & it seems to me that summer is the worst time to be laid up. All you want is to be outside doing all the fun things you can in Chicago during the summer; but this particular friend was rocking some hospital time & then home time while recovering.

So what do you do for a friend who temporarily can't use 1 arm & has a REALLY sore mouth? Make soup! I know, I know, its summer, its hot, who wants to eat soup? Our friend did :) Honestly though, everyone needs to eat & it has always been my contribution to friends and family in need. A lot of us struggle to cook when we are living a normal, busy week. When a curve ball like an illness/injury/death comes into play- cooking is one of the first things to fall by the wayside - at least in my experience. At the end of the day though, we all need nutritious (& ideally delicious) food to sustain us during tough times. I am happy to be the friend who can provide at least a little support in that area.
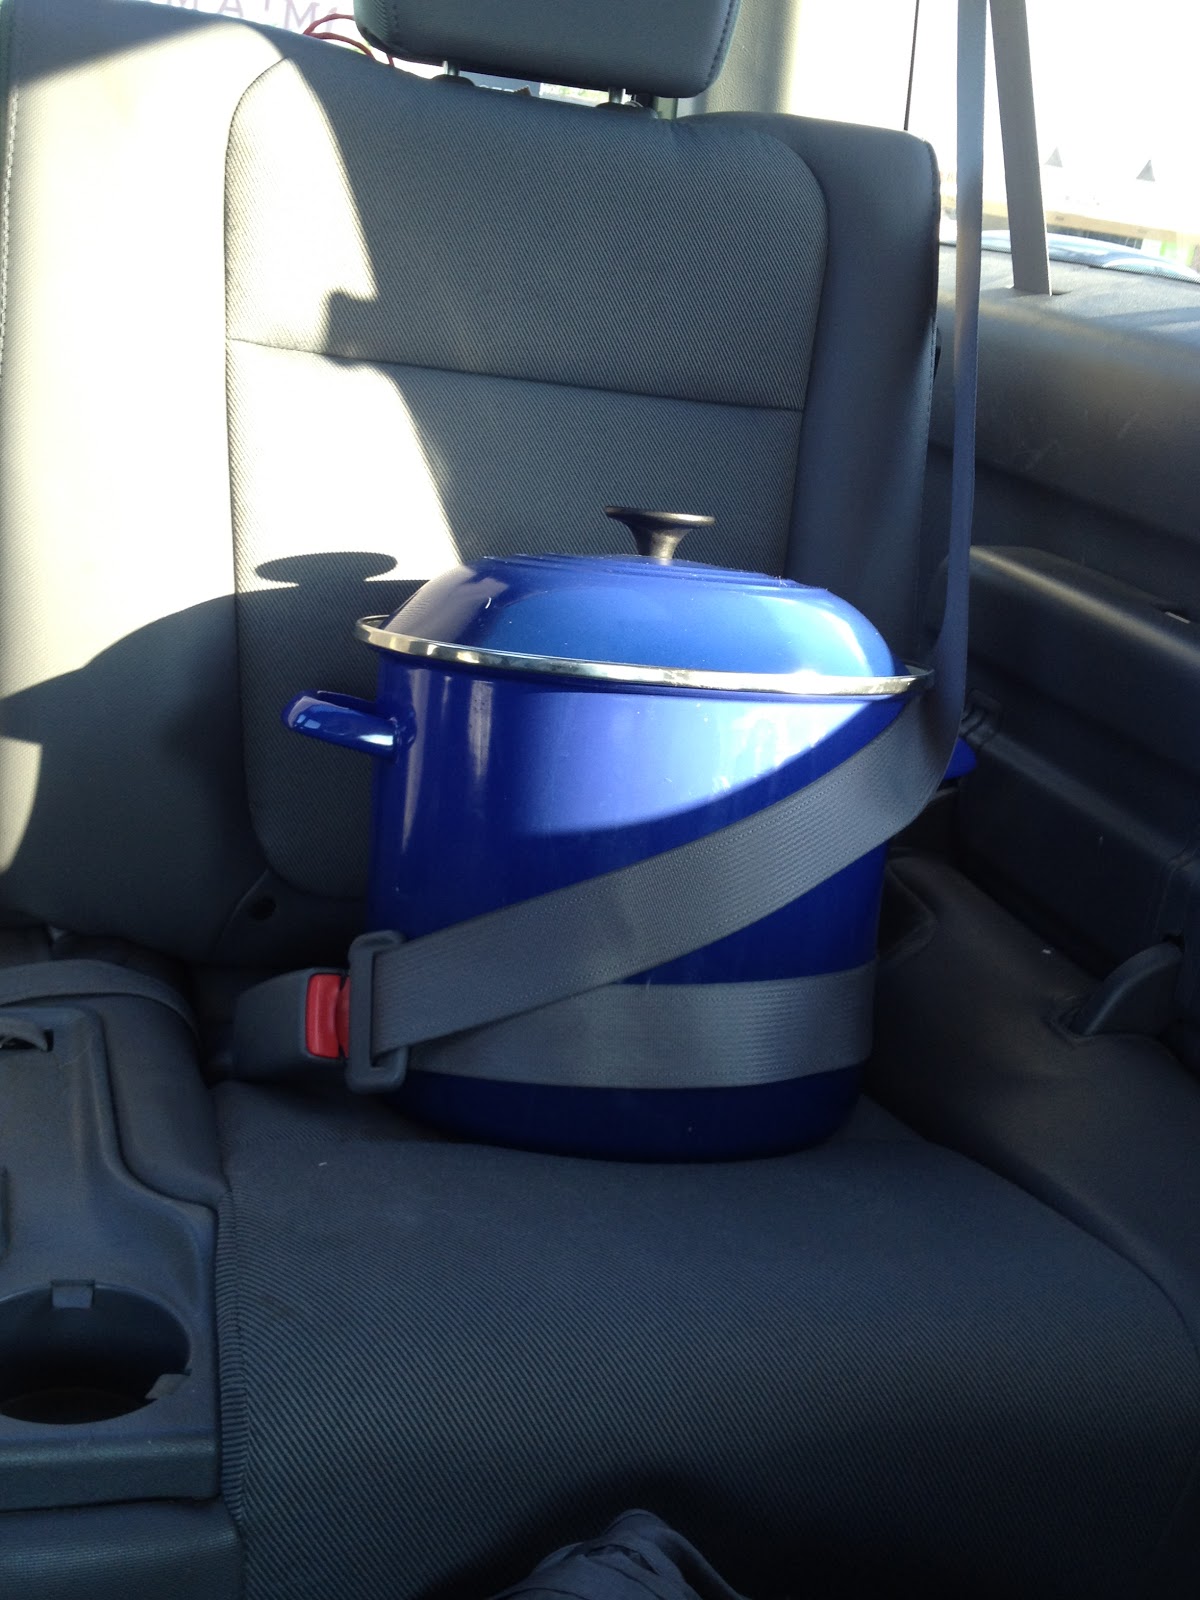
Soup must be safe!

The recipe below is compliments of my Mom, who gifted us a GIANT cookbook of her fabulous recipes as a wedding gift. I love my Mom & I love my Mom's recipes. She is always so generous with sharing them with me & was fine with me blogging about this one. In case you want more information on my Mom's cooking school (currently available only for private events) here is her website; http://www.coachousegourmet.com/ . Because my Mom is so tech savvy you can also follow her blog here; http://coachousegourmet.blogspot.com/ - perhaps some traffic to her blog will encourage my Mom to post some more recipes!

You may wait until the fall or winter to make this soup- but it is bright & citrusy (the cilantro & lime do the trick) so it is not a crazy thing to enjoy this season.

Trader Joe's Mix = delicious & easy
The recipe includes directions for homemade tortilla strips, but I opted for cornbread instead - since the recipient of this batch of soup wouldn't have been able to enjoy the crispy crunchy strips. I encourage you to make & add them to the soup if you try it- the contrast of textures is pretty wonderful. The cornbread I made was from a mix (compliments of Trader Joe's), but I used applesauce in place of about 3/4 of the oil. Their cornbread mix is outstanding- I recommend it highly if you've never had it.

I hope you enjoy the recipe & the soup; let me know in the comments if you give it a try.

Chicken Tortilla Soup
Ingredients
3 tablespoons canola oil
5 corn tortillas (2 cut into strips, 3 torn into bite sized pieces)
1 onion, diced
6 garlic cloves, minced or pressed
2 (14.5oz) cans diced tomatoes
8 cups chicken stock
1 bag Trader Joe's Roasted Corn (in the frozen section)
1 tablespoon freshly ground cumin seeds, measured after grinding (I don't have a spice mill - so I used pre-ground cumin....it would undoubtedly taste better if I had ground it fresh, but I had to do what I had to do!)
1 chipotle pepper in adobo, minced
1 teaspoon adobo sauce
4 bay leaves
1/2 of a rotisserie chicken, shredded
Juice of 1 lime
1 small bunch of cilantro, leaves chopped
3/4 cup sour cream, for garnish

Directions
1. Cut 2 tortillas into thin strips. Sauté in 2 tablespoons of canola oil. Drain on paper towels & set aside.
2. Add remaining 1 tablespoon of oil to a large soup/stock pot. Sauté onions until soft. Add garlic, sauté one minute.
3. Add tomatoes, chicken stock, corn, cumin, chipotle, adobo sauce, 3 tortillas torn into bite sized pieces, and bay leaves.
4. Simmer 20 minutes
5. Remove bay leaves. Add lime juice & chicken.
6. Simmer additional 10 minutes if your rotisserie chicken was refrigerated. 
7. Stir in cilantro, ladle into bowls & serve with sour cream & sautéed tortilla strips. (I didn't use sour cream for serving....because I don't like it. As mentioned above, I served it with a side of cornbread instead of the crunchy sautéed tortilla strips!)


Saturday, July 14, 2012

Arugula Bruschetta

I love arugula.
Peppery & bright green arugula makes the perfect summer green, in my most humble opinon. We spend an awful lot of time in southern Wisconsin at my parents' lake house in the summer months. All of the time "up at the lake" as we say, gives me a chance to utilize my parents' giant & wonderful gas grill. Living in a condo makes it a little tough to own a giant & wonderful gas grill, so I make do with cooking on my parents'!

We had some arugula in the fridge from the Green City Market (http://www.greencitymarket.org/index.asp) in Chicago that was begging to be used, so I tried it in bruschetta. For the record, the Green City Market is worthy of its own post- I love an awful lot about that place, the arugula is just the tip of the iceberg.

You may already know that I think bread is always better when it is warmed/toasted but when we were having 100+ degree days at the lake, no one wanted to warm the kitchen by turning on the oven, which is why I grilled the bread for the bruschetta. The grill left delicious char on the bread & saved me from my Mom's admonishing for making her kitchen too hot. Win win, right?

Here is the recipe for the bruschetta, everyone gobbled it as a side dish at dinner 1 night, so I made it as an appetizer the next night! We found large tomatoes worked far better than cherry tomatoes did. I have no idea why; but I wouldn't recommend cherry or grape tomatoes in this recipe. I hope you enjoy this recipe as much as my family & I did!
Arugula Bruschetta


Arugula Bruchestta

Ingredients
2 large tomatoes, diced
2 generous handfuls arugula
3 cloves garlic, minced or pressed
1/2 loaf French baguette (or 1 demi loaf)
Olive oil for brushing the bread
Kosher salt (to taste)
Freshly ground pepper (to taste)

Directions
Chop the tomatoes, mince or press the garlic, and chop the arugula. Mix together in a pretty bowl (don't waste a dirty dish here- use the bowl you'll serve it in to mix it!). Add a few pinches of kosher salt & a few grinds of black pepper and mix well. Give it a taste & increase the salt & pepper to your liking.
Preheat your grill (ideally you are using your grill to cook the rest of your meal, but if not, preheat for about 10 minutes)
Slice the bread on the bias (so the pieces are pretty ovals, not plain rounds :). Brush both sides with olive oil & sprinkle with a bit of salt & pepper. Grill over indirect heat for about 1 minute per side (keep close watch - it doesn't take long for the bread to look like charcoal.......which isn't really what we're going for!).
Serve the bread with the topping and enjoy with your friends or family. And wine. Definitely have a cool glass of white wine too.

Happy summer everyone!

Monday, July 9, 2012

Growing basil- outside!

I love fresh basil, particularly in the summer.

My lovely little basil plant!
I have a brown thumb which I am trying so hard to transform into a green one, but many a plant has perished at my hand!

This year I took the plunge and put a pot of basil out in my building's backyard. It is still alive (about 4 weeks later! Typically my basil plants last closer to 4 days when they stay in my apartment) I had been told that growing things inside could be part of the reason my thumb is so brown....apparently plants just prefer to grow outside, who knew?? It seemed high time to test this theory!

My little plants are giving me snippings of basil to use in some new summer recipes, which is simply the best. I now have a glimpse into why some people love to garden so much!

I used some of my basil in a new appetizer recipe I tested on my book club. It is a Goat Cheese & Fig Grilled Cheese (recipe below, compliments of the website, www.myrecipes.com and Cooking Light) which only requires a sprinkle of fresh basil, but it gave the sandwiches some flavor complexity and balanced the sweetness of the honey a bit. I chose to slice the sandwiches into 4 triangles each (like your mom used to do with your PB & J when you were little) and they made a great appetizer.

Sorry I didn't take a photo of the sandwiches- but really - this post is about my greening thumb & my love of my little basil plants.
I hope you enjoy the recipe, I did. My hat is off to www.myrecipes.com & Cooking Light for a fun new summer option.

Goat Cheese & Fig Grilled Cheese (I've italicized the things I adjusted/changed in the recipe, to make clear the "real" recipe versus my interpretation)
Ingredients
2 teaspoons honey I used way more than this. Probably closer to 2 tablespoons
1/4 teaspoon grated lemon rind (zest)
1 (4-ounce) package goat cheese I think I made 8oz of the goat cheese mixture. As it turns out- it is a delicious dip for crackers & carrot sticks!
8 (1-ounce) slices cinnamon-raisin bread
2 tablespoons fig preserves
2 teaspoons thinly sliced fresh basil
Cooking spray I used butter because of the flavor it adds & the way it helps the bread crisp, but if you watching calories, cooking spray is a great way to go
1 teaspoon powdered sugar (I omitted this- it seemed like not a lot of flavor & a pain in my butt to use it!)
Directions
1. Combine first 3 ingredients, stirring until well blended. Spread 1 tablespoon goat cheese mixture on each of 4 bread slices; top each slice with 1 1/2 teaspoons preserves and 1/2 teaspoon basil. Top with remaining bread slices. Lightly coat outside of bread with cooking spray.
2. Heat a large nonstick skillet over medium heat. Add 2 sandwiches to pan. Place a cast-iron or heavy skillet on top of sandwiches; press gently to flatten I didn't want to dirty another pan, so I simply pressed down on the sandwiches with the back of my spatula!. Cook 3 minutes on each side or until bread is lightly toasted (leave cast-iron skillet on sandwiches while they cook). Repeat with remaining sandwiches. Sprinkle with sugar. Or don't sprinkle with sugar....its your prerogative!
3. Slice into 4 triangles if you're serving as an appetizer, or 2 triangles if you're eating it as a main dish!

Tuesday, June 19, 2012

Popsicles on the stoop

I love summer.
I love the sun, the heat, the long days with daylight lasting past 9 o'clock. I love that the heat makes me slow down (because I pay the high price of pit stains & a bright red face if I do my normally fast walk anywhere!).
Last night Chris & I sat on our stoop and I had a popsicle. I adore the chance to sit in the heat of the night and catch the drips of my frozen treat. It simply is not as enjoyable to eat a popsicle in the air conditioned comfort of my home; I need to be hot to fully enjoy a popsicle.
Maybe I love eating popsicles on the stoop because it feels like an old fashioned thing to do. Perhaps people "back in the day" took more time to slow down and watch the world go by. I suspect people were just as busy back then as we are now; although they may have been busy with things like washing their clothes by hand- which I do not envy. It doesn't change the old timey feeling I get by plopping down outside my building in the dark to do nothing but enjoy myself. 
Our reality last night meant Chris getting home after 9pm, us eating a late dinner & sharing a delicious beer, and me requesting time on the stoop. Maybe I needed that time on the stoop because it made the dirty dishes wait to be washed, made Chris forget work for a bit, and made me savor my husband, my neighborhood & an icy frozen fruit filled popsicle.
Moments like those are reminders of why I love summer.

Friday, June 8, 2012

Fruit Fly Designs

 I love my sister.


Fruit FlyDesigns Earrings-copper&silver

Perhaps that goes without saying, but it never hurts, right? I also love the fact that she is now a jewelry designer! My sister (Marg/Marge/Margie/Mage or just Margaret) recently launched her own jewelry company, Fruit Fly Designs! I am so proud of her, the things she makes are beautiful and all handmade by her! 

Fruit Fly Designs Earrings-copper&silver


As you can see by the photos, she focuses on natural materials, sterling silver, copper, leather, and a variety of stones. As of now, she is selling earrings, necklaces, rings, and bracelets (although I don't have any photos of the bracelets right now).

Fruit Fly Designs Necklace-silver & leather


Fruit Fly Designs Necklace Close Up (I'm wearing it right now!)


I visited my sister & brother in law last weekend and helped a bit with categorizing the jewelry and getting it organized for its official debut in July! Marg will be offering Fruit Fly Designs jewelry for sale at an artists' co-op in her town. The co-op opens in July, it is called Ally Bally Bee and I can't wait to visit again to see the jewelry amongst all of the other art for sale!

Fruit Fly Designs Ring - copper & silver

As if my sister's jewelry and the launch of her new business weren't enough; I also am the proud owner of all the jewelry shown on this post! My sister thought I gave her WAY more help than I did........she is so generous she gave me a bunch of jewelry for helping! Did I mention I love my sister?


If you are interested in buying some of my sister's beautiful jewelry 
(& how could you not be interested??......its awesome!)
 please email her at margaret(@)fruitflydesigns.com 
(I don't want her to get a bunch of spam- 
so I am not making the email address a hyperlink! Obviously do not include the parentheses around the @ sign if you want her to receive your email :)

Thursday, May 24, 2012

Beer Under Glass

Some of our food & beer relaxing on the lawn
 I love craft beer. 
I love Chicago's Craft Beer Week. I love tasting new beers while enjoying delicious food samples and looking at beautiful plants. That basically sums up the event Chris & I attended last week!
Beer Under Glass (held at the beautiful Garfield Park Conservatory, http://www.garfield-conservatory.org/) is the annual kick off to Chicago's Craft Beer Week and is just a blast!
Delicious beer- beautiful flower
 We tried a ton of great beer, our favorite (or at least my favorite) was from Haymarket Brewery (http://haymarketbrewing.com/). Their Mathias Imperial IPA is a total mouth full & packs a punch at 10% alcohol by volume! They represented with delicious food too- kielbasa & bratwurst pictured above are both from Haymarket.
Even cacti like beer
The food competes with the beer for my attention every time we attend a tasting.....I guess I just really like to eat! City Provisions (http://www.cityprovisions.com/) informed me in a facebook post that they were pulling 45 pounds of pork for the amazing sliders they provided. It made me so happy to know what they were bringing- because everything I've had from their deli has been great. The sliders were my favorite food at the event! A dill pickle slice, cole slaw & perfectly prepared pulled pork on a soft roll. They are not included in the photo above - Chris & I both ate them standing up immediately after we got them!

If you want more info about Chicago Craft Beer Week (still going on........it's actually so awesome it stretches into a week & a half!) visit http://chibeerweek.com/. There are so many fun events with outstanding beers - how am I supposed to find the time to do it all?!?

Monday, May 7, 2012

Chocolate Chip Salted Caramel Cookie Bars

I love salted caramel anything as of late.
I was wandering around Pinterest a couple of weeks ago and came across a recipe for Chocolate Chip Salted Caramel Cookie Bars and I knew I needed to try it! You can find the recipe here; http://www.twopeasandtheirpod.com/chocolate-chip-salted-caramel-cookie-bars/

I baked these for the first time while visiting my in laws in the Philadelphia area and they were a big hit!

Chocolate Chip Salted Caramel Cookie Bars

My only 2 issues with my effort on this recipe were: 1. I didn't use a coarse enough sea salt- so there wasn't that chunky salt feeling when I ate the bars (which clearly I ate my fair share!). I personally love the chunky salt feeling when eating anything with salted caramel. The 2nd problem I had was that the bars were SO goopy after cooling for a couple of hours. They were still delicious, but messy and required a plate & fork. Good to know: they were PERFECT the next morning.

I love anything you can make ahead- it makes life so much easier. This is a perfect "make ahead" dessert, because is was way better after it had 12+ hours to cool.
My sister made the recipe too, she added oats & said it turned out really well- so it is also clearly a recipe you can get creative with..............which I think makes it even better.

Let me know if you try this recipe - for your in laws- or anyone else!